Difference between revisions of "ORCID Support"
(→Manage ORCID Permissions) |
(→ORCID Support Advance) |
||
| Line 66: | Line 66: | ||
[[File:orcid_create_or_connect.png|800px|thumb|none]] | [[File:orcid_create_or_connect.png|800px|thumb|none]] | ||
| − | When clicked, the user will be taken to the ORCID site where they may sign in to connect their existing ORCID, or may create a new ORCID if they do not already have one. | + | When clicked, the user will be taken to a new screen where they may specify which permissions they grant the repository when connecting to their orcid.org profile. By default all permissions are granted unless specified otherwise, which includes allowing the repository to connect with the orcid.org profile, read restricted works from the profile, and update activities on the profile. |
| + | |||
| + | [[File:orcid_manage_permissions.png|800px|thumb|none]] | ||
| + | |||
| + | Once the user has specified which permissions they would like to grant the repository, clicking the 'Create or Connect your ORCID ID' button, will take the user to the ORCID site where they may sign in to connect their existing ORCID, or may create a new ORCID if they do not already have one. | ||
[[File:orcid_sign_in.png|800px|thumb|none]] | [[File:orcid_sign_in.png|800px|thumb|none]] | ||
| + | |||
Upon completion of this process, the user will be redirected to the 'Manage ORcID Permissions' screen. | Upon completion of this process, the user will be redirected to the 'Manage ORcID Permissions' screen. | ||
| − | |||
| − | |||
| − | |||
Each time the permissions are updated by clicking the 'Connect to ORCID' button, the user will once again be asked to sign in to ORCID, as per the initial connection, so that orcid.org is aware of the permissions the user has granted to the repository. | Each time the permissions are updated by clicking the 'Connect to ORCID' button, the user will once again be asked to sign in to ORCID, as per the initial connection, so that orcid.org is aware of the permissions the user has granted to the repository. | ||
When the 'Create and update publication details on your ORCID record' check box is selected, the repository will try to update the user's orcid.org profile with details about their institution. By default, the institution will be added to the ORCID profile's 'Employment' section. However the plugin's configuration may specify that certain user types should have their 'Education' section updated instead. | When the 'Create and update publication details on your ORCID record' check box is selected, the repository will try to update the user's orcid.org profile with details about their institution. By default, the institution will be added to the ORCID profile's 'Employment' section. However the plugin's configuration may specify that certain user types should have their 'Education' section updated instead. | ||
| − | |||
| − | |||
==Import from orcid.org== | ==Import from orcid.org== | ||
Revision as of 10:23, 11 October 2017
Contents
Introduction
The 'ORCID Support' and 'ORCID Support Advance' plugins have been developed to group together various ORCID developments from across a range of repositories
'ORCID Support' provides basic ORCID functionality for the repository including the addition of a new ORCID metafield, ORCID rendering and validation, and basic reporting with the Generic Reporting Framework.
'ORCID Support Advance' builds upon the functionality of 'ORCID Support', and allows users to connect their repository profiles with their accounts on orcid.org. Once an account has been connected, the user may manage their orcid.org permissions, controlling how the repository reads and writes from orcid.org. If read permissions have been granted, works from orcid.org may be imported to the user's work area. If write permissions have been granted, records where the user's ORCID is present may be exported to their orcid.org profile.
ORCID Support
ORCID Field
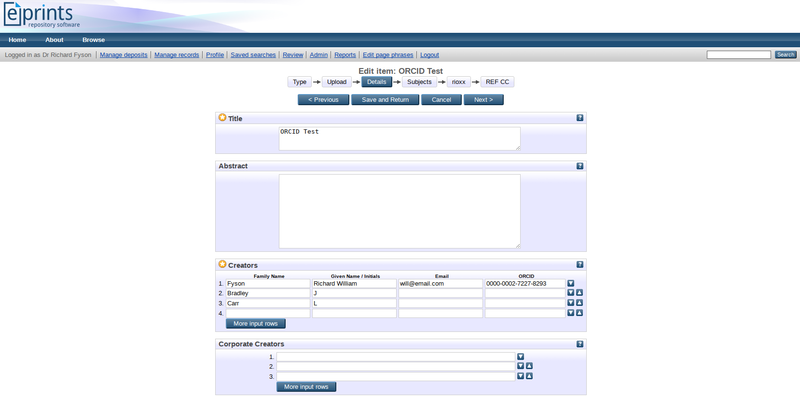
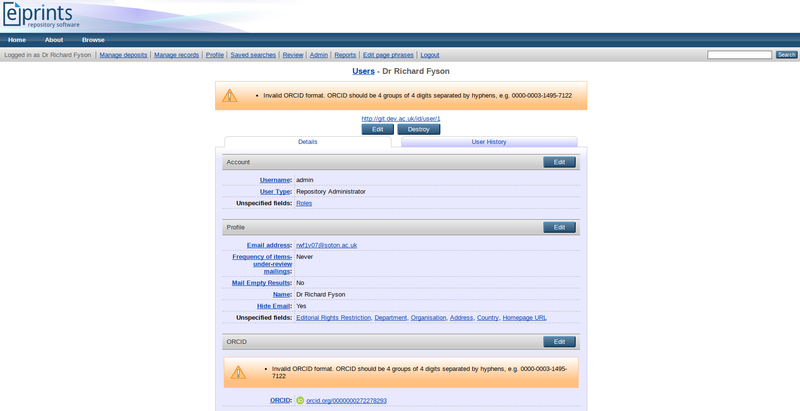
ORCID Support adds a new 'ORCID' field to both the 'Creators' and 'Editors' field, as well as the adding a new stage to the edit user workflow where an ORCID may be stored. All of these fields are of type 'ORCID', a special type of text field that validates the ORCID is of the correct format, 16 digits broken into 4 groups of 4 separated by a dash, e.g. 0000-0003-1495-7122. The field also checks that the final digit of the ORCID, the checksum, is valid and a warning is displayed if the ORCID is invalid in any way.
The lookup script for the 'Creators' and 'Editors' fields has also been updated to include the ORCID where this can be retrieved from other records where the ORCID has already been stored.
The 'Creators' and 'Editors' fields will also be automatically be populated from user profiles if the 'Creators' or 'Editors' ID subfields can be used to lookup a corresponding user profile.
Display ORCIDS
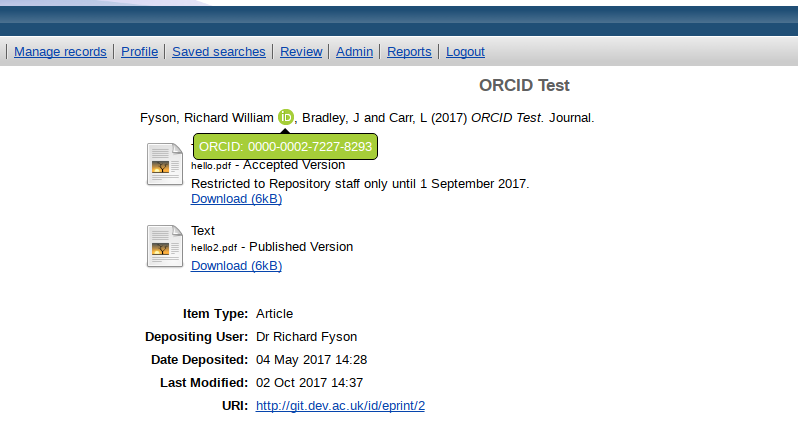
ORCIDs are always displayed next to a small, green ORCID badge, and in form of a link to the corresponding orcid.org profile.
Where space on the screen is more restricted, such as in citations, the ORCID itself is removed and only the green ORCID badge is displayed. The badge still links to the orcid.org profile and when hovered over, the ORCID is displayed in a green tooltip.
Reports
Where the Generic Reporting Framework plugin has been installed, new reports will become available, under the heading 'ORCID Dashboard'.
The 'All users with and without ORCIDs' report will show all the users in the repository, showing users without an ORCID as non-compliant and users with an ORCID as compliant.
The 'Users with ORCIDs' report, is similar to the 'All users' report, but instead only shows the users who have ORCIDs in their user profile.
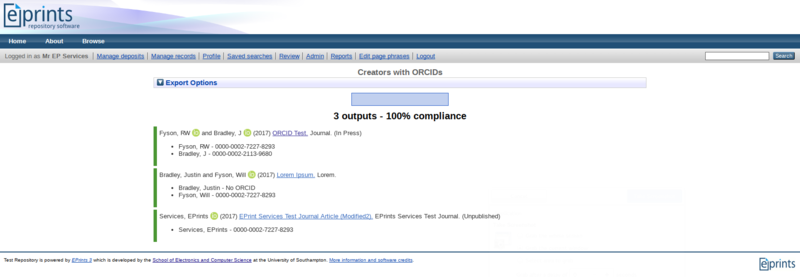
Finally, the 'Creators with ORCIDs' report will highlight all EPrint records that have 'Creators' values with ORCIDs assigned to them.
RIOXX
Where the RIOXX plugin has been installed, ORCIDs will be added as the 'id' attribute for <rioxxterms:author> elements.
For Developers
Updating Citations
ORCID Support provides a function for rendering green ORCID badges which show the user's ORCID in a tooltip when hovered over. To add these in a citation, simply include the following when displaying creator or editor fields.
<!-- For Creators -->

<print expr="people_with_orcids(creators)" />

<!-- For Editors -->
<print expr="people_with_orcids(editors)" />
ORCID Support Advance
ORCID Support is required for ORCID Support Advance
Connecting to orcid.org
Before users can import or export from orcid.org, they first need to connect their repository user profiles with their orcid.org user profiles. This can be done via the 'Create or Connect your ORCID iD' link that appears in the menu area when the logged in user does not have an ORCID associated with their account.
When clicked, the user will be taken to a new screen where they may specify which permissions they grant the repository when connecting to their orcid.org profile. By default all permissions are granted unless specified otherwise, which includes allowing the repository to connect with the orcid.org profile, read restricted works from the profile, and update activities on the profile.
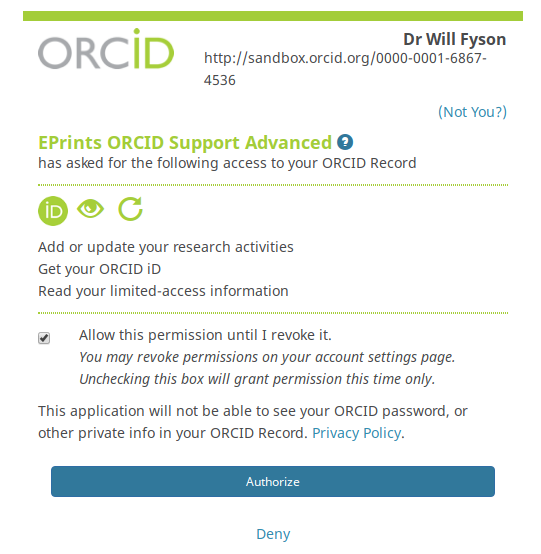
Once the user has specified which permissions they would like to grant the repository, clicking the 'Create or Connect your ORCID ID' button, will take the user to the ORCID site where they may sign in to connect their existing ORCID, or may create a new ORCID if they do not already have one.
Upon completion of this process, the user will be redirected to the 'Manage ORcID Permissions' screen.
Each time the permissions are updated by clicking the 'Connect to ORCID' button, the user will once again be asked to sign in to ORCID, as per the initial connection, so that orcid.org is aware of the permissions the user has granted to the repository.
When the 'Create and update publication details on your ORCID record' check box is selected, the repository will try to update the user's orcid.org profile with details about their institution. By default, the institution will be added to the ORCID profile's 'Employment' section. However the plugin's configuration may specify that certain user types should have their 'Education' section updated instead.
Import from orcid.org
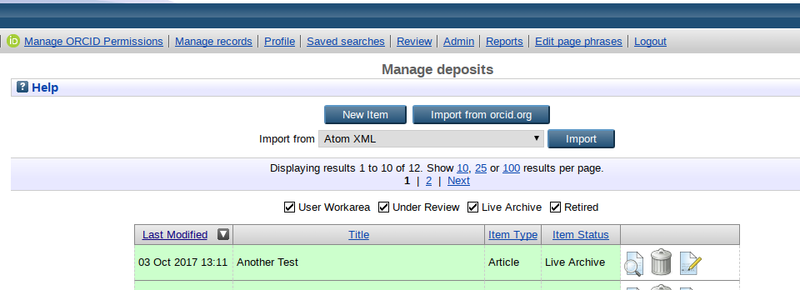
With the 'Retrieve restricted details from your ORCID profile' option selected in the 'Manage ORCID Permissions' screen, a 'Import from orcid.org' button should appear on the 'Manage deposits' screen.
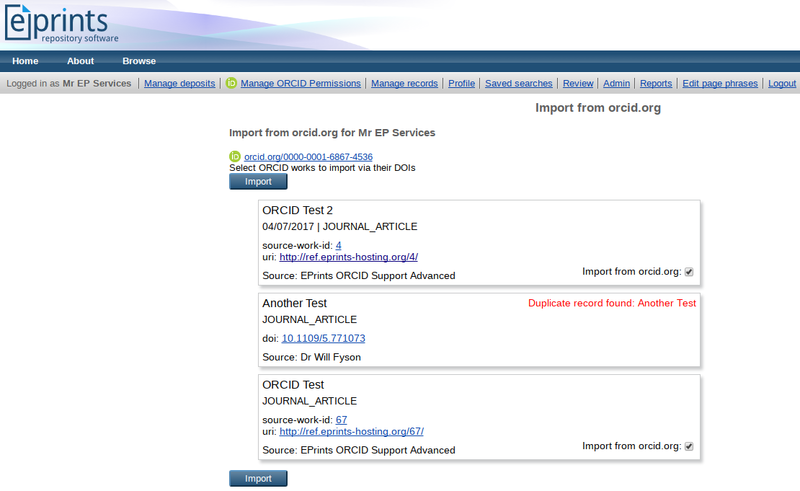
This screen will display all of the records from the user's orcid.org profile which the user has given permission to be read. Users can select which records they would like to appear by selecting the check boxes (all checkboxes are selected by default). If the record has been imported previously, the option to select the record for importing again will not be presented.
The 'Import from orcid.org' will also appear on user profile screens, allowing admin users to import records from orcid.org on behalf of the repository's users.
Export to orcid.org
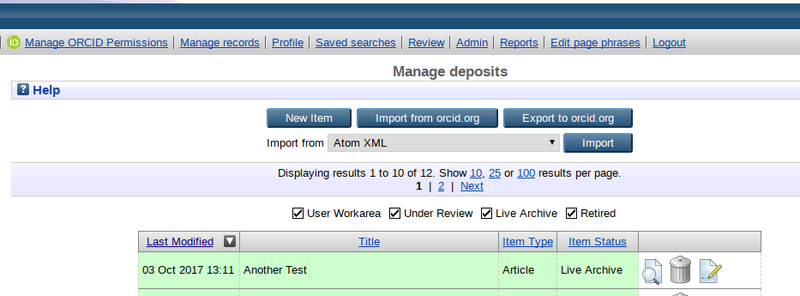
When the 'Create and update publication details on your ORCID record' option is selected in the 'Manage ORCID Permissions screen, the 'Export to orcid.org' button appears on the 'Manage deposits'
The 'Export to orcid.org' will also appear on user profile screens, allowing admin users to export records from the repository to the user's orcid.org profile, on behalf of the repository's users.
Like the import screen, here the user may select which records they wish to export to their orcid.org profile using the checkboxes. The records presented are any of those where the user's ORCID is listed in the 'Creators' field.
For Developers
Configuration for the ORCID Support Advance plugin is stored in 'z_orcid_support_advance.pl' at the local archive level.
To use the plugin, a 'client_id' and 'client_secret' will need to be provided. ORCID members may acquired these credentials by registering the repository as a client application at https://orcid.org/content/register-client-application-production-trusted-party.
When registering the Redirect URI should be your repositories address followed by 'cgi/orcid/authenticate'.
E.g. https://test-eprints.org/cgi/orcid/authenticate/
For non-members, a sandbox API is also provided which only gives access to ORCID details stored in the ORCID Sandbox. The Sandbox is a test website, which only sends emails to @mailinator email addresses and does not contain the records found in the Production Registry (for more info please see the Sandbox FAQ).
###General ORCID Support Advance config###
$c->{ORCID_contact_email} = $c->{adminemail};

$c->{orcid_support_advance}->{client_id} = "XXXX";
$c->{orcid_support_advance}->{client_secret} = "YYYY";

$c->{orcid_support_advance}->{orcid_apiv2} = "https://api.sandbox.orcid.org/v2.0/";
$c->{orcid_support_advance}->{orcid_org_auth_uri} = "https://sandbox.orcid.org/oauth/authorize";
$c->{orcid_support_advance}->{orcid_org_exch_uri} = "https://api.sandbox.orcid.org/oauth/token";
$c->{orcid_support_advance}->{redirect_uri} = $c->{"perl_url"} . "/orcid/authenticate";
The RINGGOLD identifier for the repository's institution may also be defined here, as used by ORCID Support Advance when trying to update the user's orcid.org profile:
#Details of the organization for affiliation inclusion - the easiest way to obtain the RINGGOLD id is to add it to your ORCID user record manually, then pull the orcid-profile via the API and the identifier will be on the record returned.
$c->{"plugins"}->{"Event::OrcidSync"}->{"params"}->{"affiliation"} = {
                                                "organization" => {
                                                        "name" => "My University Name", #name of organization - REQUIRED
                                                        "address" => {
                                                                "city" => "My Town",  # name of the town / city for the organization - REQUIRED if address included
                                                        #       "region" => "Countyshire",  # region e.g. county / state / province - OPTIONAL
                                                                "country" => "GB",  # 2 letter country code - AU, GB, IE, NZ, US, etc. - REQUIRED if address included
                                                        },
                                                        "disambiguated-organization" => {
                                                                "disambiguated-organization-identifier" => "ZZZZ",  # replace ZZZZ with Institutional identifier from the recognised source
                                                                "disambiguation-source" => "RINGGOLD", # Source for institutional identifier should be RINGGOLD or ISNI
                                                        }
                                                }
};
